
Panettone: A Traditional Sweet Bread is a Symbol of Christmas Greetings
Panettone: A Traditional Sweet Bread is a Symbol of Christmas Greetings
•November 25, 2017 • Comments Off on Panettone: A Traditional Sweet Bread is a Symbol of Christmas GreetingsHaut-de-Cagnes; Le village des artistes
•August 19, 2017 • Comments Off on Haut-de-Cagnes; Le village des artistesHaut-de-Cagnes; Le village des artistes
•May 18, 2017 • Comments Off on Haut-de-Cagnes; Le village des artistesPiacere - Food & Travel without rules!
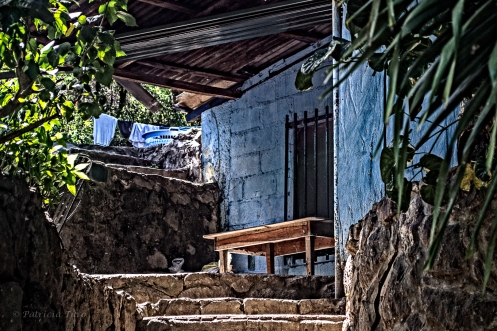
The pebble-paved streets wind through Haut-de-Cagnes’ narrow alleyways past stone houses, artist’s studios, restaurants and a few shops. The Chateau Grimaldi, a fort built around the 1300 dominates the village overlooking the sea. Replicas of canvases by well-known artists who painted this romantic place are stationed at the locations of the scene. The clay colors of the roof tiles, grays of stone walls, colorful vines creeping up the sides of the ancient buildings seem to be growing where ever they can find a little earth. Haut-de-Cagnes is a heritage site, classified as a “Monument of France”.

When I first walked up the pebble streets some 30 years ago, I thought I was stepping into a Renior canvas. Brush strokes and pallet knives created this village from the imagination of a genius painter I thought. Of course it must be, because Renoir lived and worked in Les Colette just around…
View original post 1,452 more words
Easter Dolci – A Taralli that Floats on Air
•February 22, 2017 • Comments Off on Easter Dolci – A Taralli that Floats on AirPiacere - Food & Travel without rules!
Traditional Italian food of Easter typically includes: capretto o agnello al forno (roast lamb), cacioffi fritti (fried artichokes), pizza rustica (a pie stuffed with ricotta, sausage and hard boiled eggs), la colomba di Pasqua (a dove-shaped sweet bread). Taralli, cassatelli, biscotti di pignoli, pena di Pasqua (sweet bread with hard-boiled, pastel colored eggs baked in the center), and torta di ricotta (Ricotta cheese cake) are prepared in every Italian home.


Chocolate Easter eggs are a special treat for children in Italy. The “uovo di pasqua” – a large decorative chocolate egg that comes with a gift inside are beautifully wrapped in elaborate and colorful decorative foils weighing from a few ounces to about 18 pounds. Stores are filled with “uovo di pasqua” creating a psychedelic and festive atmosphere. In past times, parents would take the gifts to their cioccolataio (chocolate maker) and it would be placed inside the chocolate egg.
View original post 536 more words
Italian Easter Rice & Ricotta Pie
•February 15, 2017 • 1 CommentPiacere - Food & Travel without rules!
Torta di Ricotta e Riso
Ricotta is typically made from the whey of mozzarella, provolone, and other cheeses in Italy. It is made from sheep’s, goat, buffalo and cows milk whey. It is a sweeter, dryer cheese then the version made in the US, which is made of cow’s milk. It is lighter and is naturally low in fat. Used in many dishes in Italy such as cassata, biscotti, pizza, and pasta i.e. lasagna and ravioli, Ricotta is the favored cheese in Easter dishes in Italy. Calzone, Pizza Rustico, cassata, torta di riso, cannoli are made in every household on Easter.
Torta di Ricotta e riso is an Easter specialty in my family. Some might call this a calzone or pizzagaina, but we call it a torta or pie. If you are a vegetarian this torta is the original recipe and requires no adjustments as it contains only rice and…
View original post 425 more words
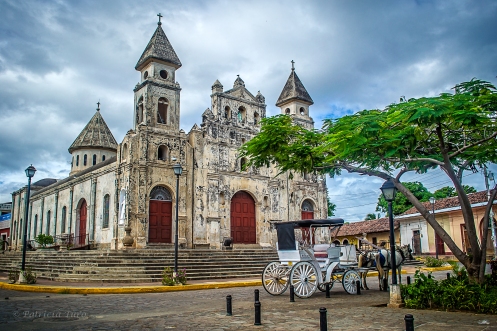
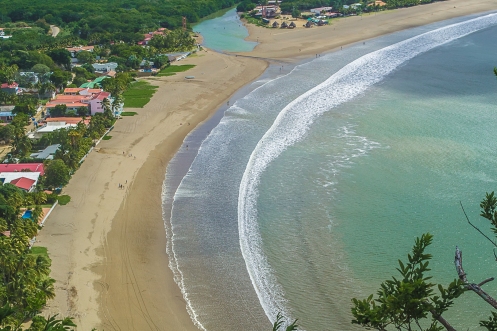
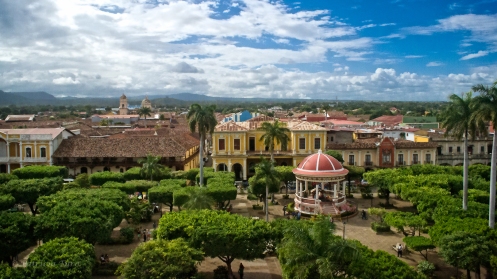
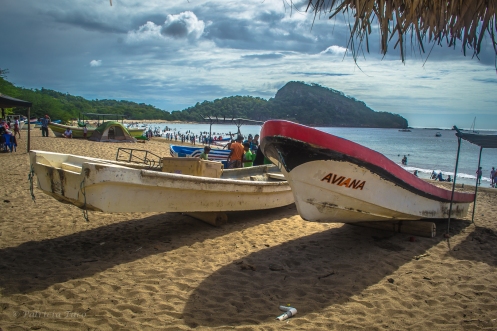
Nicaragua – Volcano’s, Colonial Architecture and Welcoming People
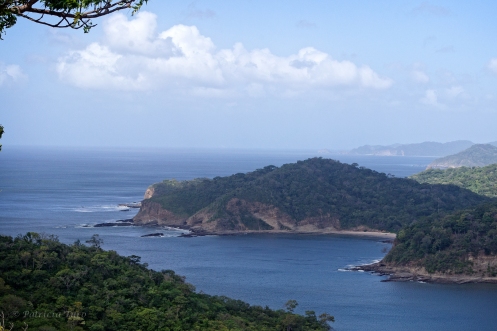
•January 14, 2017 • 6 CommentsThe country with its dramatic landscape, lakes, rain forests, jungles, volcanoes, markets and welcoming people is in transition. Its colonial cities such as Granada and Leon are colorful, a photographers paradise.
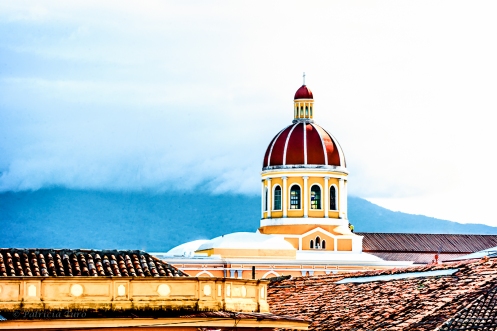
The population is 95% catholic and there are many churches; a colorful country with buildings, doors and dwellings painted in bright tones. Tourist are discovering the culture and beauty of the country and there is a transition under way.
Those who are not afraid to experience adventure, traveling the country by car can be very rewarding. The landscapes with cone shaped volcanoes, lakes, beaches and pastures are dramatic.
Although the infrastructure is only just beginning to be developed, there are a few good highways and many of the roads are challenging but drivable. We traveled from the North-west to the South-west of the country, parallel to the Pacific Ocean coast line, visiting the major inland cities.
Although the driving is slow it also allows you to see rural life and stop at the small food stands along the way. I highly recommend renting a car and experiencing the country and culture.
It should be said that speaking Spanish is a must. Although you can find a few people in the cities, particularly in the hotels that can speak English.
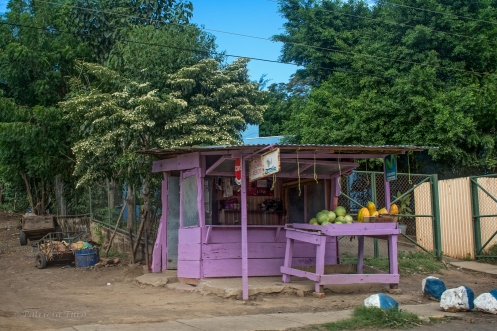
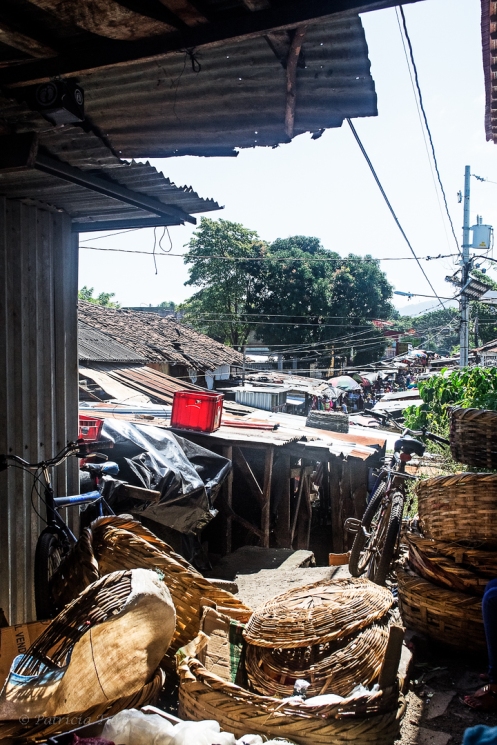
I can’t say enough about the warm nature of the people. In general they live in dwellings that are built from any type of material that can be found, many with dirt floors and within their property they are cleaning and sweeping to maintain an orderly environment constantly.
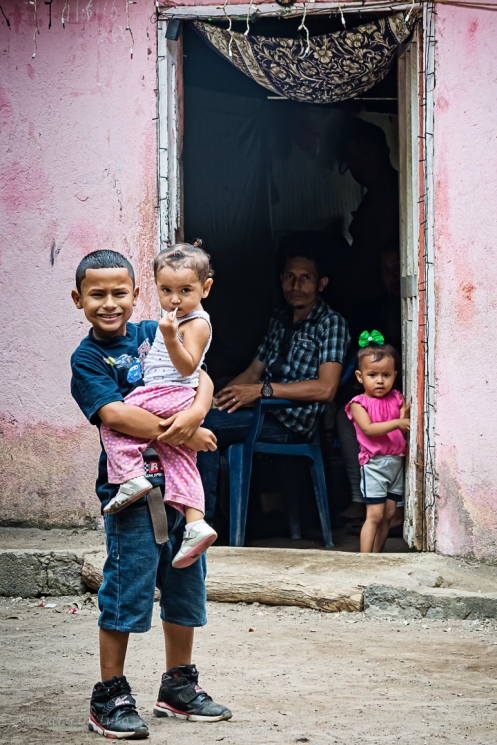
Their dwellings are often built in the jungle under trees for shade, smoldering fires are lit to keep bugs away. They are friendly, and more then willing to engage in an attempt to converse, or have you take their photo.
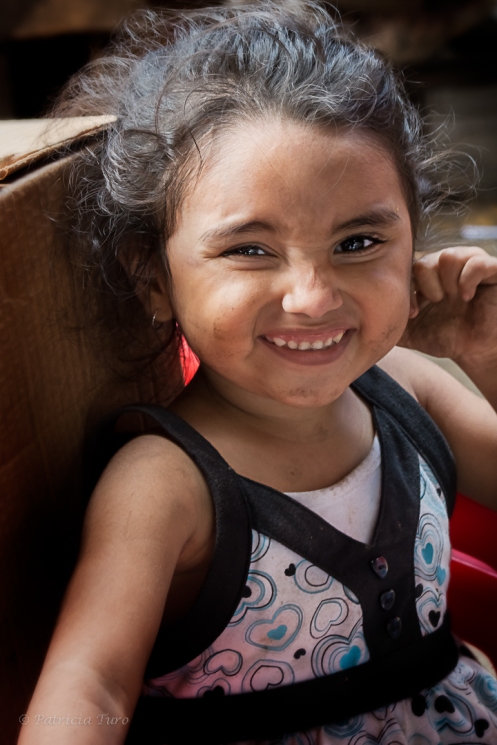
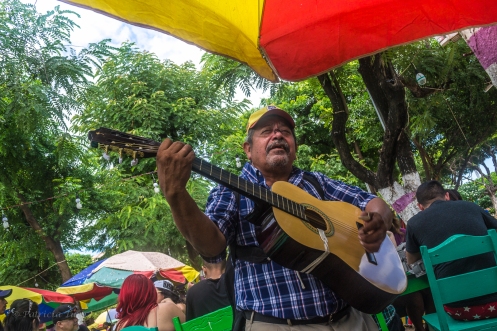
They love music, dancing and being together with family. Their neighborhoods are a close community of people and they are hard workers.
It also must be said that the common areas are filled with trash and my guess is that the country doesn’t have the infrastructure to handle trash removal. The beaches, crowded with locals all the time, are not well maintained. High-end condos for foreigners are in the process of being constructed along the coasts, but the small villages, small hotels, restaurants and roads are inadequate to handle large numbers of tourist.
Having said this, we ate in the local restaurants and found the food to be not only delicious and fresh, but we totally enjoyed everything about them including all the local activity and entertainment.
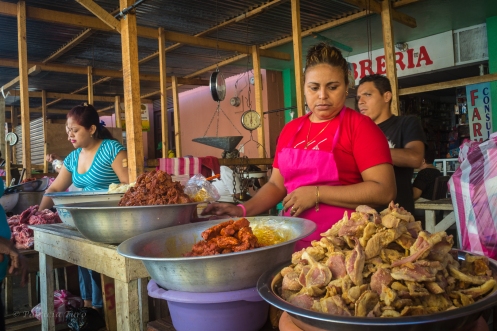
It was fun to spend time being locals for a little while. The food is very inexpensive and there is no need to eat at higher end restaurant. We visited cantinas, small little eateries, beachfront restaurants and the local markets and never had a problem.
It is always best to be aware of eating in local places, it can be risky, but although we brought along all the medication we needed, we never had the need to use them.
Adventure travelers will find hiking, volcano sliding, zip lining, surfing and many other sporting adventures to explore. There are 25 volcanoes, 9 of which are active. Hiking them opens dramatic panoramas in every direction.

It is time to visit Nicaragua now and enjoy this interesting country before progress changes it.
Panettone: A Traditional Sweet Bread is a Symbol of Christmas Greetings
•December 21, 2016 • Comments Off on Panettone: A Traditional Sweet Bread is a Symbol of Christmas GreetingsPiacere - Food & Travel without rules!
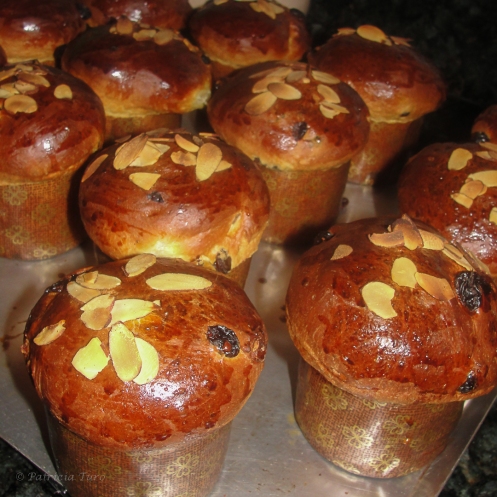
A traditional sweet bread made at Christmas time, panettone was created in the Lombardy region of Italy and is the undisputable holiday favorite. Scholars have traced panettone back to the middle ages. The dome shaped sweet bread is traditionally made with candied fruits, zest and flavored with liquors. Today you can find it with chocolate chips and other ingredients. It is less like a cake then light fluffy sweet bread. The use of natural yeast results in a dough that rises slowly. The rising time can be as long as 48 hours. The long leavening contributes to the long shelf life, which can be as long as 6 months. Italian bakers take pride in the age of their leavening and some are maintained over many years.
It is eaten in Italy with a glass of white wine and in earlier time generally served as a dessert. Panettone is recognized in…
View original post 734 more words
An Italian Christmas Tradition and Pizzette for dessert
•December 20, 2016 • Comments Off on An Italian Christmas Tradition and Pizzette for dessertPiacere - Food & Travel without rules!

My grandmother would make biscotti for days before Christmas and hide them in an armoire in her front hall under lock and key. If she allowed any of us to get close to them, they would have disappeared long before Christmas. But if we asked her nicely, she never said no. She took the key out of her apron pocket and unlocked that treasure chest filled with sweet, spiced biscotti and handed you some of your favorites.
She had a small white sideboard with a roll-down top. Here she made all her biscotti and that sideboard was our first stop when we entered her kitchen. We could never understand how so many wonderful desserts could be prepared on such a small surface. When I was young I remember her cooking on a black iron stove and blocks of ice being delivered for her wooden icebox. She was in her element…
View original post 615 more words
Glugg, Spiced Wine for Holiday Greetings
•December 19, 2016 • Comments Off on Glugg, Spiced Wine for Holiday GreetingsSince I have so many hits for this recipe during the holidays , I decided to post it again. Hope you have a wonderful holiday and enjoy my Uncle Vic’s recipe.
Piacere - Food & Travel without rules!
Every year on Christmas Eve, we gathered at Uncle Vic’s house for our traditional Italian Christmas Eve dinner. As family and friends arrived, he would greet them with a cup of his famous Glugg. The aroma of Glugg filled the house with the wonderful scent of spices. Coming in from the cold New England winter and greeted with a warm cup of Glugg instantly made you feel that you were home. With the fire glowing in the fireplace and the family gathered around snatching a piece of fried fish, the festivities began.
He always had the biggest Christmas tree that he cut down himself. Covered with old antique ornaments and everyone’s gifts stacked under the tree, we could hardly get into the living room. The house was open to anyone who didn’t have a place to go and filled with fun as each person arrived bring their homemade biscotti as…
View original post 496 more words
International Black & White Spider Awards
•November 6, 2016 • Comments Off on International Black & White Spider AwardsThe International Black & White Spider Awards were announced November 5th in a world-wide presentation online. Two of my photo’s were nominated.
11th Annual Jury members included captains of the industry from National Geographic, Washington DC; The Armory Show, New York; TBWA, Paris; Victoria Film Festival, Canada; Aeroplastics Contemporary, Brussels; Studio Hansa, London; Fratelli Alinari, Florence; Australian Centre for Photography; Young & Rubicam, Lima; and Anthem Worldwide/Marque Branding, Sydney who honored Spider Fellows with 627 coveted title awards in 31 categories.”It is an incredible achievement to be selected among the best from the 7,556 entries we received this year,” said Basil O’Brien, the awards Creative Director. ”
The Gelmersee Bridge
Located in Oberwald, Switzerland above the Grimsel Pass is Gelmersee (lake). The bridge is situated at the entrance of the Gelmerbahn mountain railway to the Gelmersee. It is a pedestrian bridge suspended over the Handeggfall with a spectacular view of the dramatic falls.

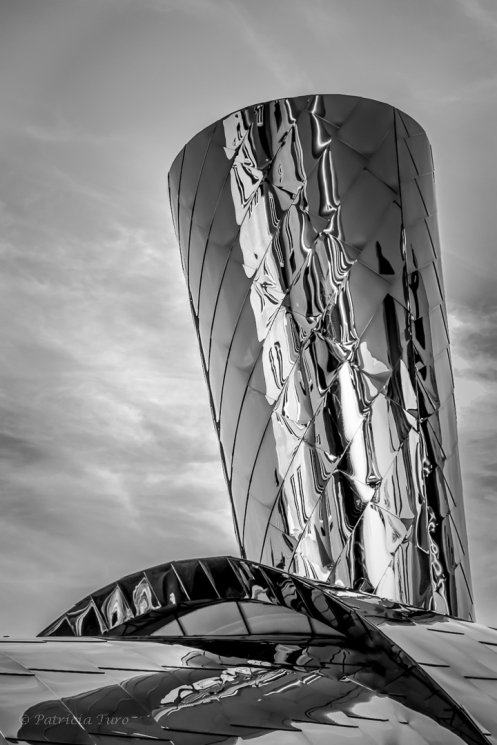
The Raymond & Maria Stata Center
The Raymond & Maria Stata Center was designed by Frank Gehry. Located at MIT in Cambridge, Massachusetts is the Electrical Engineering and Computer Science Departments as well as student dorms on the upper floors. The exterior tiles reflect the surrounding landscape and creates a visual picture of the activities of student life in the area.


 Bridal and Formalwear consignment store in North Andover, Massachusetts.
 Affordable website design for small businesses.
You must be logged in to post a comment.